 Michail Lyamaev
Previously, in forums, people often discussed how to make the so-called "fur coat", a bandage on the rotor, so that the magnets would not fly apart at high speeds. This was done so, the rotor was machined, some bush was made to the height of the magnets or a rope was wound, then holes were drilled under it for the diameter of the magnet, and magnets were mounted on epoxy resin. All this froze and it was believed that the magnets would hold tight.
Nothing has changed since then. In the same way: there is a fur coat, there are magnets, there is a bandage, there is enhanced adhesion.
We will do the opposite, first we glue magnets (in article 4 this is described in detail), and after that, we make a "fur coat" around them.
How it's done:
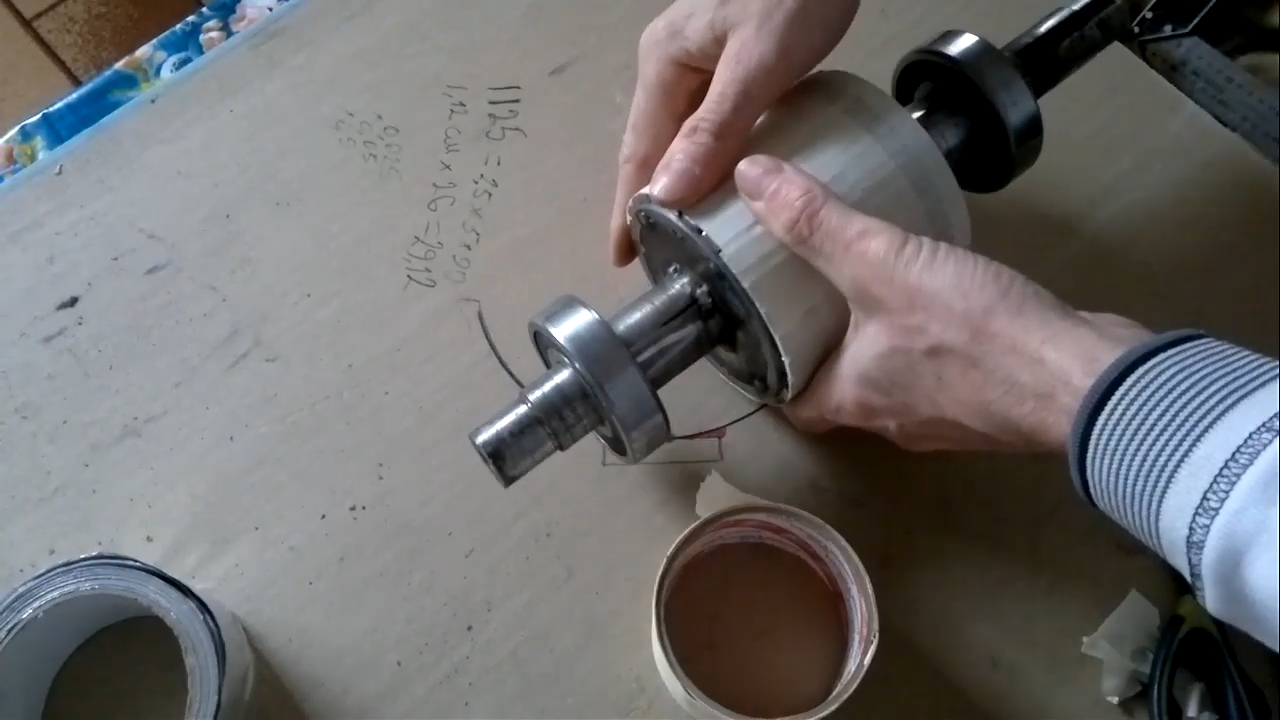
First we need to calculate the approximate area of the fill.
We measure the distance between the magnets (2.5 mm), multiply by the height of the magnet (5 mm) and multiply by the length of the magnet (90 mm). mm cubic, or 1.12 cubic centimeters. We have 26 such strips, so we multiply 1.12 by 26 and get 29.12 cubic centimeters. We found that about 30 ml of epoxy is needed on our rotor. Take 50 ml so that there is a supply for spilling.
Preparation of resin: Before gluing, it is advisable to put a container with resin and the rotor itself in a warm place. This is to ensure that the resin has good flowability.
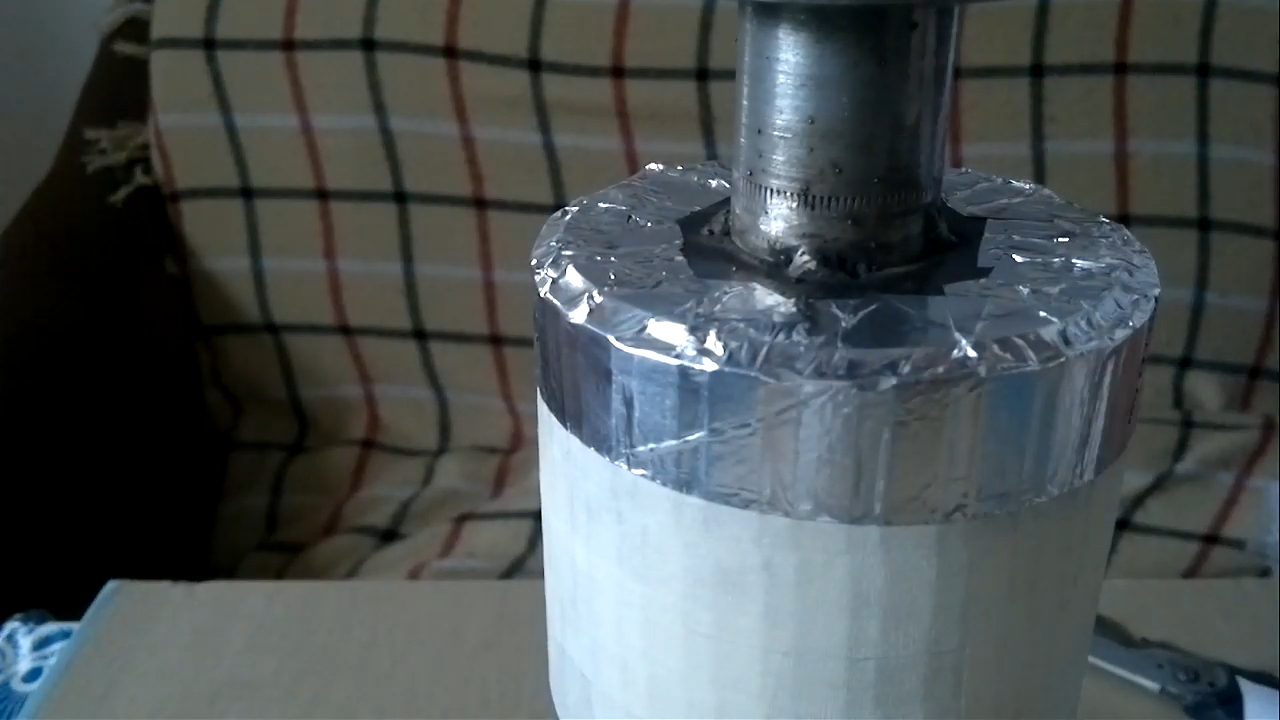
Preparation of the rotor: Our rotor must be sealed with paper clerical or masking tape. Seal so that there are no wrinkles or holes in the paper. You also need to leave a small overlap on one side as in the picture. Next, paste the second layer of adhesive tape. On the other hand, it is desirable to glue just the dimensions of the rotor.
The third important layer is the bottom. It must be made of aluminum tape, as it tends to bend well and remain in the same position, unlike the same paper tape or the usual plastic tape. Aluminum tape seals the bottom well.
We form the bottom.
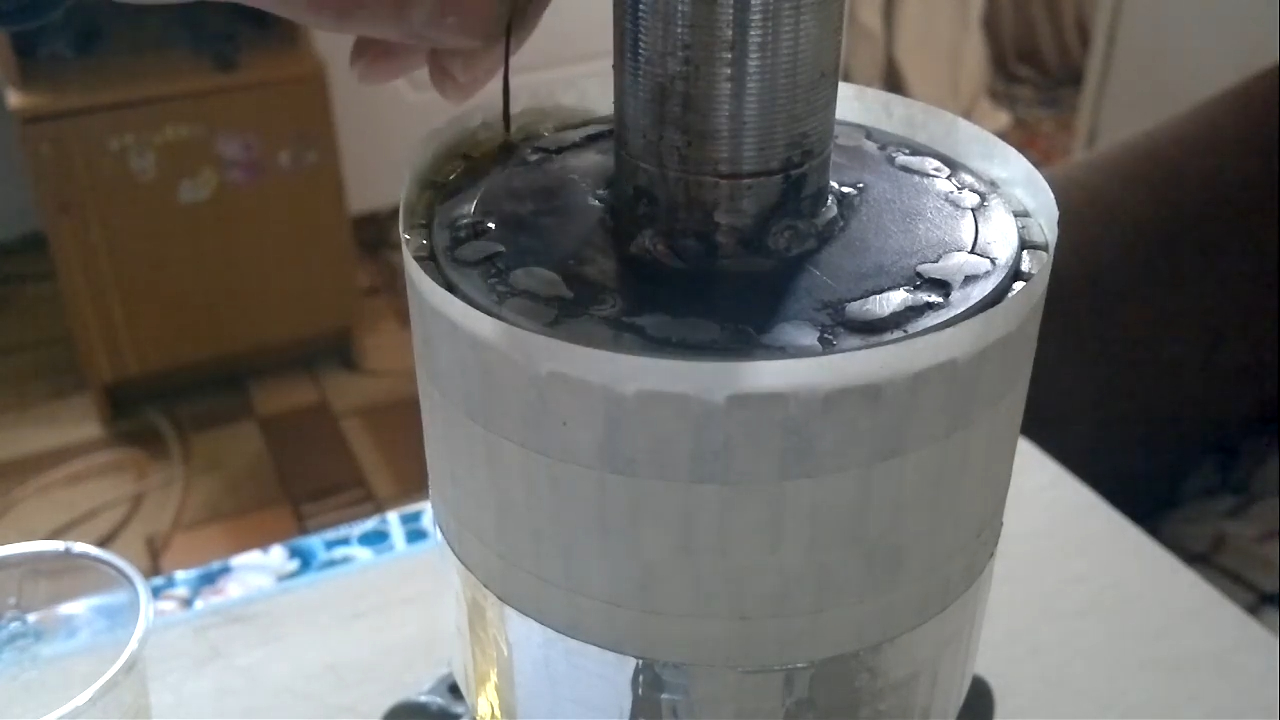
We also need to prepare a piece of wire. With the help of it, in the future we will remove the bubbles and help the epoxy to accelerate penetration between the magnets inward.
Important: the length of the wire should not reach the bottom, in order not to accidentally pierce our aluminum tape.
We measure the resin (according to our calculations, 50 grams), mix and start pouring. The resin will go inside. Lower and raise the wire slowly so that no air is sucked in. Bubbles will come out over time, so as you move back to the previously flooded magnets and remove the bubbles, pushing through our wire. Follow the instructions for your resin.
We are waiting for hardening.
After about 6 hours, it turned out that the bandage did not harden and had to remove the epoxy. We made it an ordinary plastic tube by simply passing it between the magnets. Then they wiped everything with alcohol.
The old tar didn't let us down anymore. Anything can happen, you need to be prepared for everything.